I have to admit that – Unlike 90% of people who produce customised and original material for the ‘Web – I’m no high flying thousand dollar earning professional Internet Publisher or anything like that. Indeed, the truth be known I’m actually something of a pauper compared to many “Professional” developers around…I have no internet publishing software, no installation of Dreamweaver, no copies of Flash or Photoshop knocking around, and most of my development work is split between two rather stone-age desktop PCs and an old 20MHz laptop running MS-DOS!
However, such restrictions can be more useful than many would at first realise. Having always crafted my work using Windows Notepad, I’ve become accustomed to doing everything in plain-text and previewing it in the mind as I go along…And even if I ever find myself a web development job that I can stick at, it’s highly unlikely I will ever have to make use of Dreamweaver or similar software packages.
Whilst setting up this weblog a week ago, I came up with an interesting alternative use for a web browser whilst I was generating the masthead image at the top of this page, which I will now try and describe in a way that people can follow: How to use your web browser as a free alternative to Photoshop.
Brief outline:
To get the most out of this tutorial, prior knowlege of both Javascript and CSS-2 will be extremely useful, if not a pre-requisite.
As time has gone on, web browsers have become more and more powerful in what they can achieve. Gone are the days when each image was restricted to it’s own distinct “box”, and it’s now commonplace for webpage graphics to be made up of several different images layered together using CSS. Although I’m not very well up in my CSS, I believe that CSS-2 also introduced several filters and functions for manipulating image display even further than before, including monochromatic and similar Photoshop-esque effects.
Web browsers today are powerful and functional enough to act as remote application front-ends in their own right – As many “apps” on Facebook and other sites already prove – And many are already capable of displaying multiple “layers” as if they were a single image, even being able to rotate and manipulate images “on the fly”…And it is this functionality that can be exploited to turn any capable web browser into a free Photoshop terminal!
Practical example – Producing a simple masthead:
Anyhow…Enough of my ramblings! To demonstrate the use of a web browser as a graphical editing tool, I’ll walk through the steps that I took to create the masthead image at the top of this page. Although the example itself may be a very rudimentary one, it will hopefully demonstrate the underlying principles in a way that most can understand. Feel free to follow along using My Website as a workbench – Although please use thy browser cache to save my bandwidth, if possible! 🙂
To give a common feel across my three weblogs, I wanted to duplicate the masthead used on my own website as accurateley as possible. As my WordPress weblog style used a header image that was exactly 750×140 pixels in size (And WordPress charges $14.00 a year for customised CSS!) simply rescaling the masthead from a screen grab would’ve resulted in a very nasty looking header, and nothing like the masthead that I wanted to have.
To start off, here’s what the original masthead looked like before I started playing with it – Along with the equivalent HTML used to produce it: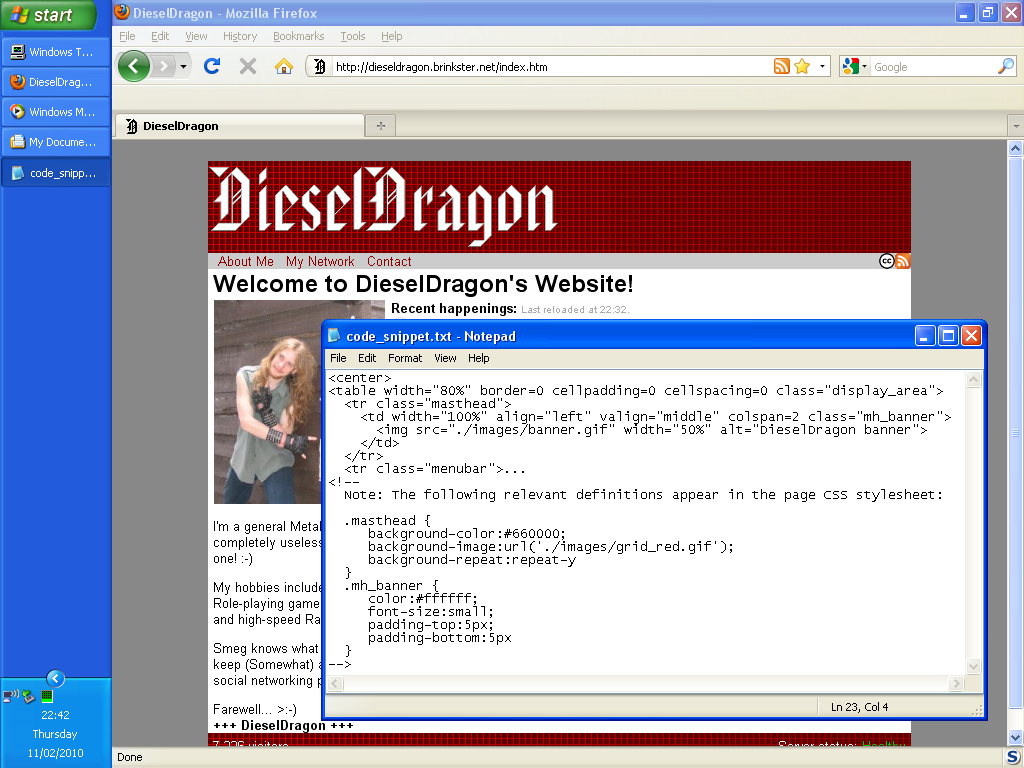
As the masthead is formed by the top table row with a scaled image and a background defined using CSS, resizing the elements on the page (Using Javascript injection in my case, but editing an HTML page stored locally works just as well) would allow the masthead to be changed in realtime to suit my needs.
In doing just this, I went through the following steps:
- Taking a copy of the existing HTML code to allow for “undoing” any bad changes using javascript:prompt('Copy this output', document.getElementById('TableRowID').innerHTML);
- Resizing the parent table to the desired dimensions using javascript:document.getElementById('TableID').style.width='DesiredWidthpx'; and javascript:document.getElementById('TableID').style.height='DesiredHeightpx';
- Redefining the contents of the table row using javascript:document.getElementById('TableRowID').style.innerHTML='DesiredContents';
- Repeating the above processes until the masthead looked as desired before grabbing, cropping, and saving the image using Paint.
It helps to have Notepad running throughout to use as a temporary “scrapbook” for code snippets. If you are using Javascript injection via the URL bar, having Notepad to hand will allow you to space out instructions on seperate indented lines which can be [Backspace]’d together before cutting and pasting the command into thy browser.
As I needed a 750×140 pixel masthead, the first order of business would obviously be to resize the table and top row to fit the dimensions desired: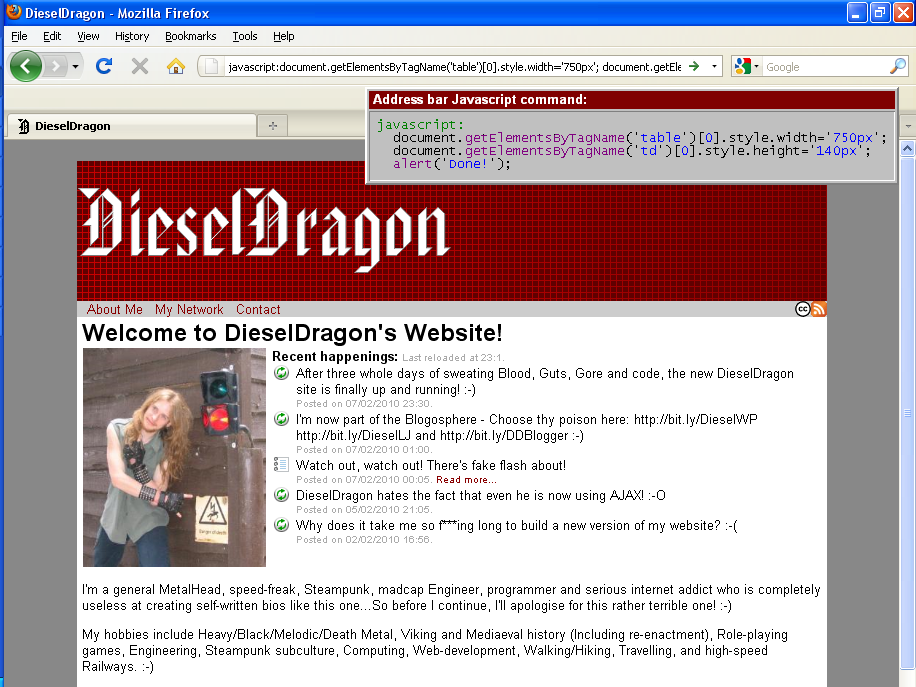
You’ll notice that I’m adding an alert(); function to the end of my JS commands; This is because the default location for javascript output in FireFox appears to be new document, meaning that the browser will redirect to a window showing command output on it’s own, and on-page changes will be lost when you click the “back” button. Adding an alert(); traps this in a way, discarding any console output from the previous function and keeping the browser at the current page.
As I also wanted to “title” each masthead with the name of the weblog service in question, I needed to add appropriate text to reflect this. As the original masthead used a single 100% width cell and I wanted to split this in half to orient each element seperateley, I changed the code for the entire table row to divide it into two 50% width cells – The left cell containing the image, the right cell containing the weblog title.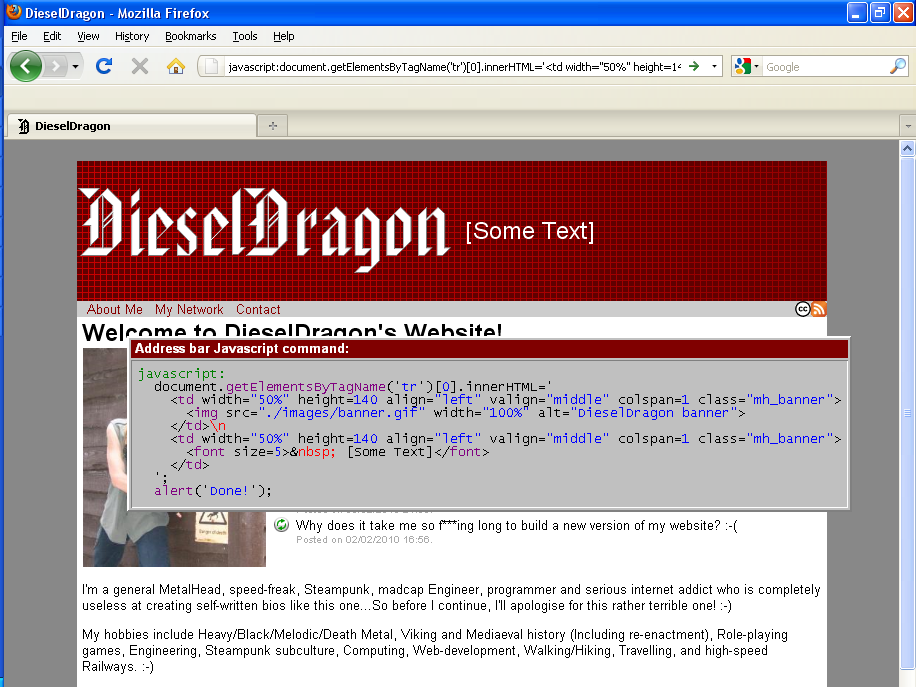
Although from this point I re-coded the entire table row every time I wished to change the display, adding ID parameters to the new table cells would allow each cell to be addressed individually…Limiting whole re-codes of the row only to when the actual table structure needs to be changed.
Once this had been done, I went about defining and tweaking the table contents until I got them how I wanted them – In this case, that meant playing around with the size and alignment of text on the lower-right hand side until it was suitable. After several edits to the injected JS code that I was using to change the page content, I ended up with the following result: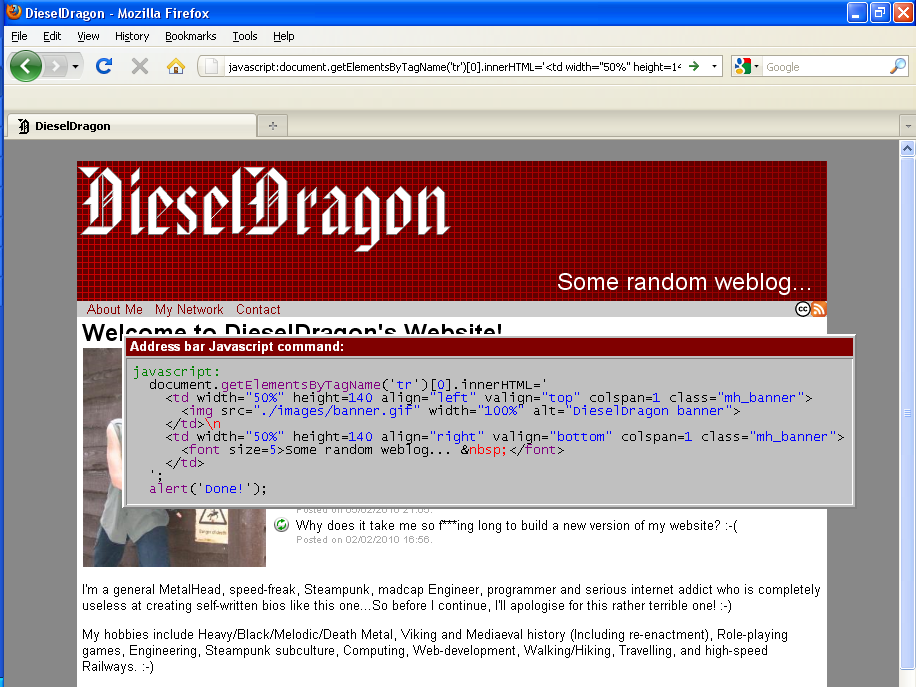
Once the masthead had been defined as I wanted, it was a simple matter of cutting/pasting a screen grab of the page into MS Paint, cropping it appropriateley, and saving a master copy as a 24-bit bitmap image for local and archival use. Of course, high-order bitmap images are not suitable for the web in any way (Unless you run a corporate Intranet with lots of free server space and a blisteringly fast network!) so this image needs to be re-saved in a more appropriate web-friendly format.
Although selecting the “best” format for any image is beyond the scope of this article, here are a few general rules of thumb that I tend to apply when doing this:
- If the image mainly contains photographic elements, a lot of gradients, solar flares or other complicated graphics, use the JPEG format. This is optimised for photographs, and is ideal for images running into the thousands or millions of colours.
- If the image is primarily graphical (Like a company logo), contains relatively few distinct colours, and is mainly made up of simple graphics and text, use the GIF format. Although GIF images only have a 256 colour palette, the compression technique used in the format allows for superior image compression with little or no loss of quality*, and animated images are supported.
- If the image is made up of both complex/photographic elements and plain graphics, use the Portable Network Graphics (PNG) format. This combines the advantages of both of the above formats and allows storage of images close to their true colours with little or no loss of quality, although file sizes may be larger than an optimally encoded image in one of the other two formats.
(PNG support across browsers is still not standardised, display can vary across platforms, and older browsers do not support them. This aside however, the PNG format is being held likely to replace the GIF format as time goes on and adoption increases across platforms.)
* – Note: When saving an image into a limited colour space (Such as saving a 24-bit bitmap as a 256 colour GIF image) Windows Paint applies a generic default/web-safe palette to the outgoing image, and matches pixels in the original to their closest match in the new palette without any other analysis of the former. In Layman’s terms, this means that – Even if your 24-bit image only has 200 different colours in it – Paint will still convert pixels to their closest palette match and generally make the image look crap.
Advanced users who know the bitmap format at a technical level and how to use a hex editor can work around this limitation by creating a customised palette in a new file by hand in whatever colour space, opening that new file in Paint, and then simply cutting/pasting the image over. Paint should (Hopefully) match the colours right if the palette has been created correctly.
Anyhow…That’s all from me, especially as this tutorial’s taken me over six long hours to bash out! Before I ‘Blog Off for the night though, here’s a little bit of fun that I had with the Google search page using similar techniques to the above! 🙂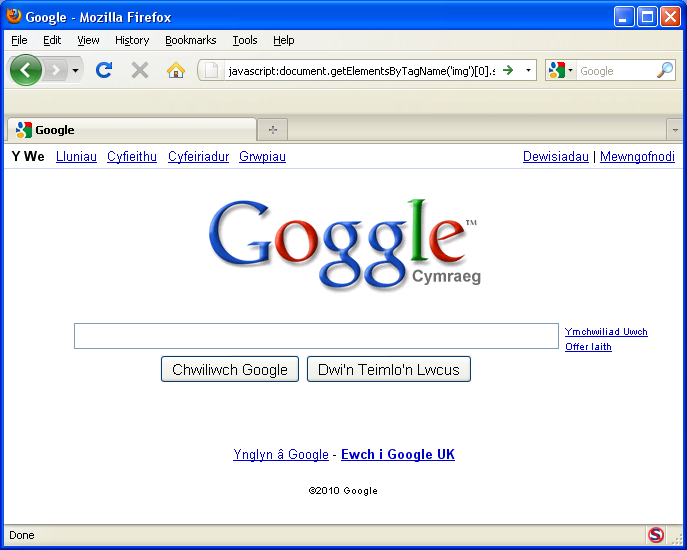
Farewell for now, and hope this is of help to someone. If ye enjoyed it, please comment and let me know! ![]()
+++ DieselDragon +++


 Posted by DieselDragon